
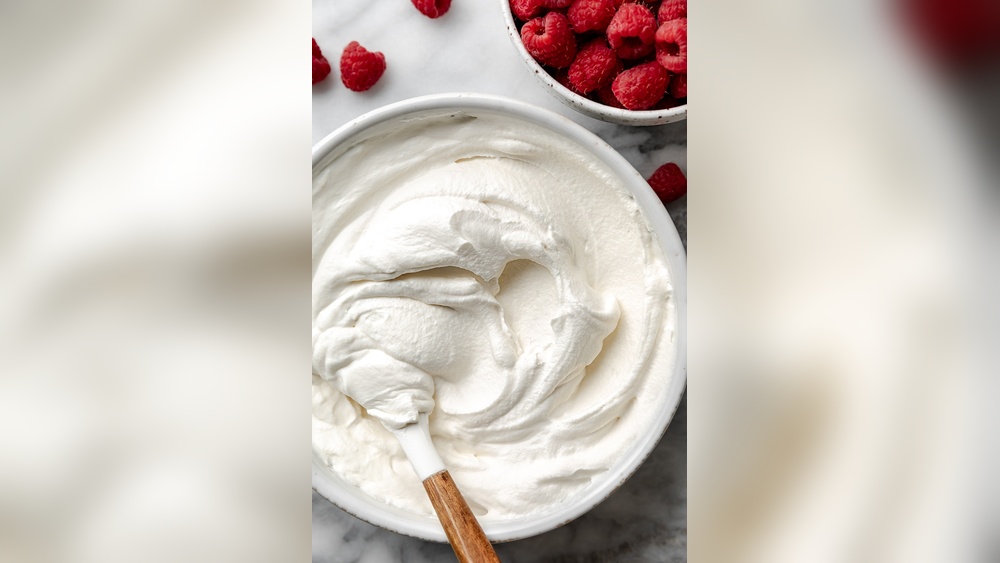
Creating real whipped cream from scratch is a surprisingly simple culinary achievement that elevates desserts from ordinary to extraordinary. Forget the canned stuff; the fresh, airy, and rich flavor of homemade whipped cream is unparalleled. It’s a versatile ingredient, perfect for topping pies, cakes, fruit, or even just enjoying by the spoonful. This guide will walk you through the essential techniques, ingredients, and tips to master the art of making perfect whipped cream every time, ensuring a delightful and impressive addition to your baking repertoire.
Key Takeaways
- Heavy cream is crucial: Opt for heavy cream or whipping cream with a fat content of at least 30-35% for optimal whipping.
- Cold ingredients and tools are essential: Ensure your cream, bowl, and whisk are thoroughly chilled to help the fat globules stabilize and trap air.
- Sweetening and flavoring: Sugar (granulated or powdered) and vanilla extract are common additions, but you can experiment with other extracts and liqueurs.
- Avoid over-whipping: Stop whipping once you reach stiff peaks to prevent the cream from turning grainy or into butter.
- Stabilization options: For longer-lasting whipped cream, consider using gelatin, cornstarch, or cream of tartar.
- Troubleshooting common issues: Address problems like under-whipped, over-whipped, or grainy cream with specific solutions.

The Science And Art Of Whipped Cream
Whipped cream, at its core, is an aerated emulsion. It’s created by incorporating air into heavy cream, which is primarily composed of fat globules dispersed in water. When you whip the cream, the fat globules collide and begin to break, forming a network that traps the air bubbles. This network is what gives whipped cream its structure and volume. The higher the fat content of the cream, the more stable this network will be, leading to a thicker, richer whipped cream.
Understanding this process is key to achieving success. The temperature of your ingredients and equipment plays a significant role. Cold cream and cold tools help the fat globules remain solid enough to form a stable structure when air is introduced.
Warm cream will result in a less stable emulsion, making it harder to whip and more prone to collapsing.
The Importance Of Fat Content
The fat content in cream is the most critical factor in its ability to whip. In the United States, cream is categorized by its fat percentage:
- Heavy Cream (or Heavy Whipping Cream): Typically contains 36% to 40% milk fat. This is the gold standard for whipping, providing the most stable and voluminous results.
- Whipping Cream (or Light Whipping Cream): Contains 30% to 36% milk fat. It will whip well, though the results might be slightly less stable and voluminous than with heavy cream.
- Half-and-Half: Contains about 10.5% to 18% milk fat. It will not whip successfully.
- Whole Milk: Contains about 3.25% to 3.5% milk fat. It cannot be whipped into traditional whipped cream.
When shopping, always look for “heavy cream” or “heavy whipping cream” for the best results. If you can only find “whipping cream,” it will still work, but be mindful of not over-whipping, as it can break down more quickly.
Why Cold Is Key
The principle of low temperature is paramount when making whipped cream. Fat globules in cold cream are firm and less likely to merge too quickly. As you whip, these firm globules are gently agitated, allowing them to link up and create a latticework that traps air bubbles.
- Cold Cream: Directly from the refrigerator.
- Cold Bowl: Place your mixing bowl in the freezer for 15-30 minutes before you start.
- Cold Whisk/Beaters: If using a stand mixer or electric hand mixer, place the whisk attachment in the freezer along with the bowl.
In my experience, even chilling the carton of cream in the fridge for a few hours beforehand can make a noticeable difference, especially on warmer days. The colder everything is, the more successful your whipping endeavor will be.
The Essential Ingredients And Equipment
To make perfect real whipped cream, you need just a few high-quality ingredients and the right tools. The beauty of homemade whipped cream lies in its simplicity.
Core Ingredients
- Heavy Cream: As discussed, this is non-negotiable. Use the highest fat content cream you can find (36-40%). Ensure it’s fresh and has not passed its expiration date.
- Sweetener:
- Granulated Sugar: Can be used, but it takes longer to dissolve and may leave a slightly gritty texture if not fully incorporated. It’s best to add it early in the whipping process.
- Powdered Sugar (Confectioners’ Sugar): This is the preferred sweetener for most recipes. It dissolves easily and contains cornstarch, which can act as a mild stabilizer, contributing to a smoother texture.
- Maple Syrup or Honey: Can be used for alternative flavor profiles, but they add liquid, which can affect stability. Use sparingly.
- Flavoring:
- Vanilla Extract: The classic choice for a reason. Use pure vanilla extract for the best flavor.
- Other Extracts: Almond, peppermint, lemon, or orange extracts can be used to complement specific desserts.
- Liqueurs: A tablespoon of Grand Marnier, Kahlua, or rum can add a sophisticated flavor. Be aware that alcohol can slightly inhibit whipping, so add it towards the end.
Essential Equipment
- Mixing Bowl: A metal or glass bowl is ideal, especially if chilled. Metal conducts cold well, making it an excellent choice. Ensure it’s large enough to accommodate the cream as it doubles or triples in volume.
- Whisk or Mixer:
- Whisk: A balloon whisk is excellent for manual whipping. It requires physical effort but offers great control.
- Electric Hand Mixer: A convenient and efficient tool for achieving whipped cream quickly.
- Stand Mixer: Ideal for larger batches or if you want a hands-off approach. Use the whisk attachment.

Step-by-step Guide To Making Whipped Cream
Making real whipped cream is a straightforward process that can be mastered with a little attention to detail. Follow these steps for consistently delicious results.
Method 1: Using A Stand Mixer Or Electric Hand Mixer
This is the most common and efficient method.
- Chill Everything: Place your mixing bowl and whisk attachment in the freezer for at least 15-30 minutes. Ensure your heavy cream is thoroughly chilled.
- Pour the Cream: Pour the cold heavy cream into the chilled mixing bowl. For a standard recipe, start with 1 to 2 cups of cream.
- Begin Whipping: Start mixing on a low speed to avoid splashing. Gradually increase the speed to medium-high.
- Add Sweetener and Flavoring: Once the cream starts to thicken slightly and small peaks begin to form (this usually takes a minute or two), gradually add your sweetener (about 1-2 tablespoons of powdered sugar per cup of cream) and flavoring (about 1/2 teaspoon of vanilla extract per cup of cream). Continue to add them slowly while the mixer is running.
- Whip to Desired Consistency: Continue whipping, watching closely. The cream will progress through several stages:
- Soft Peaks: When you lift the whisk, a soft peak forms and then gently curls over. This is ideal for dolloping or folding into other ingredients.
- Medium Peaks: The peaks hold their shape better but still have a slight curl at the tip.
- Stiff Peaks: The peaks stand straight up without collapsing. This is the most common desired consistency for topping desserts.
- Stop Whipping: Crucially, stop whipping as soon as you reach stiff peaks. Over-whipping will cause the cream to become grainy and eventually turn into butter. You’ll see the texture change rapidly in the final stages.
- Serve or Store: Use immediately or cover and refrigerate.
Method 2: Whipping By Hand With A Whisk
This method requires more effort but offers a satisfying connection to the process.
- Chill Everything: Place your mixing bowl and whisk in the freezer for at least 30 minutes. Ensure the heavy cream is very cold.
- Pour the Cream: Pour the cold heavy cream into the chilled bowl.
- Start Whisking: Begin whisking vigorously in a circular or back-and-forth motion. Keep the whisk submerged in the cream.
- Incorporate Sweetener and Flavoring: As the cream begins to thicken and show signs of aeration, gradually sprinkle in your powdered sugar and add your vanilla extract. Continue whisking.
- Whip to Stiff Peaks: This will take longer than with a mixer, potentially 5-10 minutes of consistent, energetic whisking. Watch for the formation of stiff peaks.
- Stop Whipping Immediately: Be attentive to the texture. As soon as stiff peaks form, stop whisking. If you continue, you risk turning your cream into butter.
- Serve or Store: Enjoy your hand-whipped creation immediately.
Example Whipped Cream Recipe
Here’s a basic recipe to get you started:
Ingredients:
- 1 cup (240ml) cold heavy cream (at least 36% fat)
- 2 tablespoons (25g) powdered sugar (adjust to taste)
- 1/2 teaspoon pure vanilla extract
Instructions:
- Chill your mixing bowl and whisk attachment (or whisk) for at least 30 minutes.
- Pour the cold heavy cream into the chilled bowl.
- Using a stand mixer or hand mixer on medium-high speed (or whisking vigorously by hand), whip the cream until it begins to thicken.
- Gradually add the powdered sugar and vanilla extract while continuing to whip.
- Continue whipping until stiff peaks form. Be careful not to over-whip.
- Serve immediately.

Achieving The Perfect Peaks: Soft, Medium, And Stiff
The “peaks” refer to the shape the whipped cream forms when you lift the whisk or beaters out of the bowl. Understanding these stages is crucial for controlling the final texture and stability of your whipped cream.
Soft Peaks
- Appearance: When you lift the whisk, a peak forms, but the tip droops and curls over like a soft wave.
- Texture: Very light, airy, and delicate.
- Best Uses: Folding into mousses, as a light topping for delicate desserts like angel food cake, or as a base for lighter frostings. It’s the least stable peak stage.
Medium Peaks
- Appearance: The peaks hold their shape a bit better but still have a noticeable curl at the tip. They are more defined than soft peaks.
- Texture: Still airy and light, but with a bit more body.
- Best Uses: A good all-purpose consistency for topping pies, cobblers, or serving with fruit.
Stiff Peaks
- Appearance: The peaks stand straight up when the whisk is lifted, holding their shape firmly. The tip is sharp and doesn’t droop.
- Texture: Thicker, richer, and more stable.
- Best Uses: Ideal for piping decorations, frosting cakes, or as a generous topping for rich desserts like brownies or chocolate cake. This is what most people envision when they think of classic whipped cream.
Pro Tip: The transition from medium to stiff peaks can happen very quickly. It’s essential to watch the cream closely in the final stages of whipping. If you see the texture starting to look slightly grainy or curdled, you’ve likely gone too far and are on the verge of making butter.
Troubleshooting Common Whipped Cream Problems
Even with the best intentions, sometimes whipped cream doesn’t turn out perfectly. Here are common issues and how to fix them.
Problem: Under-whipped Cream
- Symptoms: The cream is too thin, looks foamy, and doesn’t hold any shape. It might just look like thickened milk.
- Cause: Not whipped long enough, or ingredients/tools weren’t cold enough.
- Solution: Continue whipping! If you haven’t added sugar and vanilla yet, do so now and continue whipping until soft or medium peaks form. If you have already added them and it’s still too thin, it might be a fat content issue (if you used a lower-fat cream). You can try chilling it again and whipping more, but if it’s too thin, it might be difficult to salvage completely.
Problem: Over-whipped Cream
- Symptoms: The cream looks grainy, curdled, or separated. It might have a yellowish hue. If you keep going, it will turn into butter and buttermilk.
- Cause: Whipped for too long.
- Solution: This is the trickiest to fix. If it’s just slightly grainy, you can try to rescue it by slowly whisking in a tablespoon or two of unwhipped cold heavy cream. Mix on low speed or by hand just until the graininess disappears. If it has significantly separated, it’s usually too late to fully recover for a light, airy texture. However, you can continue whipping to make homemade butter!
Problem: Grainy Texture
- Symptoms: The whipped cream has small lumps or a slightly gritty feel.
- Cause: Can be a sign of slight over-whipping, or the sugar wasn’t fully dissolved. If using granulated sugar, it might not have dissolved properly.
- Solution: If using powdered sugar, the cornstarch usually prevents this. If the graininess is mild, try gently folding in a tablespoon of cold heavy cream. If the issue is undissolved sugar, it’s harder to fix without affecting the texture. Using powdered sugar from the start is the best preventative measure.
Problem: Cream Won’t Whip
- Symptoms: Despite vigorous whipping, the cream remains liquid.
- Cause:
- Low Fat Content: You used half-and-half, milk, or a whipping cream with less than 30% fat.
- Warm Ingredients/Tools: The cream, bowl, or whisk were not cold enough.
- Fat Has Been Degraded: The cream might have been agitated too much previously (e.g., shaken during transport).
- Solution: Unfortunately, if the fat content is too low, it’s impossible to whip. If the issue is temperature, try chilling everything thoroughly and whipping again. If the fat has been degraded, it likely won’t whip. Always check the fat percentage on the carton.
Stabilizing Whipped Cream For Longevity
While freshly made whipped cream is delightful, it can deflate relatively quickly, especially in warm conditions. Stabilizers help extend its lifespan and maintain its shape, making it ideal for make-ahead desserts or decorative piping.
Using Powdered Sugar
As mentioned, powdered sugar contains cornstarch, which offers a mild stabilizing effect. Simply using powdered sugar instead of granulated sugar is the easiest way to add a touch of stability.
Gelatin Stabilization
Gelatin creates a flexible, stable network within the whipped cream.
- Bloom the Gelatin: Sprinkle 1 teaspoon of unflavored gelatin over 2 tablespoons of cold water in a small bowl. Let it sit for 5-10 minutes until it swells and becomes jelly-like.
- Dissolve the Gelatin: Gently heat the bloomed gelatin mixture (in the microwave for a few seconds or over a double boiler) until it’s completely liquid and clear. Do not boil. Let it cool slightly.
- Incorporate: While whipping your cream, once it reaches medium peaks, slowly drizzle in the slightly cooled, dissolved gelatin mixture. Continue whipping until stiff peaks form.
Note: Gelatin can sometimes impart a very subtle chewiness if too much is used. Use it judiciously.
Cornstarch Stabilization (cooked Method)
This method involves cooking a small amount of cornstarch with milk or cream.
- Create a Slurry: Whisk together 1 tablespoon of cornstarch with 2 tablespoons of cold milk or cream until smooth.
- Cook: Heat 1/4 cup of milk or cream in a small saucepan. Gradually whisk in the cornstarch slurry. Cook over medium-low heat, whisking constantly, until the mixture thickens to a pudding-like consistency.
- Cool Completely: Transfer the mixture to a bowl, cover it with plastic wrap (pressing it directly onto the surface to prevent a skin), and refrigerate until thoroughly chilled.
- Whip: Add the chilled cornstarch mixture to your 1 cup of heavy cream when it reaches soft peaks. Continue whipping until stiff peaks form.
This method provides good stability without altering the flavor significantly.
Cream Of Tartar Or Lemon Juice
Adding a small amount of an acidic ingredient like cream of tartar (about 1/8 teaspoon per cup of cream) or a teaspoon of lemon juice can help stabilize the cream by slightly altering the protein structure. Add it early in the whipping process.
This method is less effective than gelatin or cornstarch but can offer a slight improvement in stability.
Here’s a comparison of stabilization methods:
| Stabilizer | Pros | Cons | Best For |
|---|---|---|---|
| Powdered Sugar | Easy, readily available, slight stabilization | Minimal effect compared to others | Everyday use, light toppings |
| Gelatin | Excellent stability, smooth texture | Can affect texture slightly, requires preparation | Piped decorations, make-ahead desserts |
| Cornstarch (cooked) | Good stability, neutral flavor | Requires cooking and chilling, slight preparation | Frostings, stable toppings |
| Cream of Tartar/Lemon Juice | Easy to add, subtle effect | Less effective than other methods | Quick stabilization boost |
Flavor Variations And Creative Uses
Once you’ve mastered the basic technique, the possibilities for flavored whipped cream are endless.
Sweet And Simple Variations
- Chocolate Whipped Cream: Melt 2 ounces of bittersweet or semi-sweet chocolate. Let it cool slightly, then drizzle it into the cream as it reaches medium peaks. Whip until stiff. Alternatively, whisk in 2-3 tablespoons of unsweetened cocoa powder with the powdered sugar.
- Coffee Whipped Cream: Dissolve 1-2 teaspoons of instant espresso powder in the vanilla extract before adding it to the cream.
- Mint Chocolate Chip: Add peppermint extract and finely chopped mini chocolate chips once stiff peaks form.
- Coconut Whipped Cream: Chill a can of full-fat coconut milk overnight. Scoop out the solid cream from the top (leaving the liquid behind) and whip it as you would heavy cream. This is a popular dairy-free alternative.
Savory Applications?
While less common, a lightly sweetened or unsweetened whipped cream can be used in some savory contexts. A very lightly sweetened whipped cream with a hint of chive or dill can be a delicate topping for certain soups or seafood dishes.
However, the primary domain of whipped cream is undeniably sweet.
Beyond Toppings
- Filling: Use stiffly whipped cream as a filling for delicate pastries like éclairs or cream puffs.
- Folding: Gently fold softly whipped cream into melted chocolate, fruit purees, or custards to create mousses and light desserts. When folding, use a spatula to gently incorporate the whipped cream, preserving as much air as possible. This technique is essential for achieving a light texture in recipes that rely on aeration, much like how a good blender can create smooth purees for desserts. For instance, a powerful blender like the Ninja Professional Countertop Blender can create smooth bases for mousses, which are then lightened with whipped cream.
- Layering: Use it as a creamy layer in trifles or parfaits.
Tips For Success And Presentation
Mastering whipped cream involves not just technique but also presentation.
Tips For Consistent Success
- Don’t Overfill Your Bowl: Leave ample room for the cream to expand. Filling the bowl more than halfway with liquid cream is asking for trouble.
- Cleanliness is Key: Ensure your bowl and whisk are completely free of any grease or fat residue, as this can prevent the cream from whipping properly.
- Taste and Adjust: Always taste your whipped cream before serving. Adjust sweetness or flavoring as needed.
- Work Quickly: Once whipped, cream is best used immediately or stored properly. Prolonged exposure to room temperature will cause it to lose volume.
Presentation Ideas
- Piping: Use piping bags and tips (star tips, round tips) to create decorative swirls, rosettes, or borders on cakes, cupcakes, and pies. This requires very stiff peaks.
- Dolloping: Use two spoons or an ice cream scoop to create rustic dollops on top of desserts or alongside fruit.
- Garnishing: A simple swirl or
Leave a Reply