
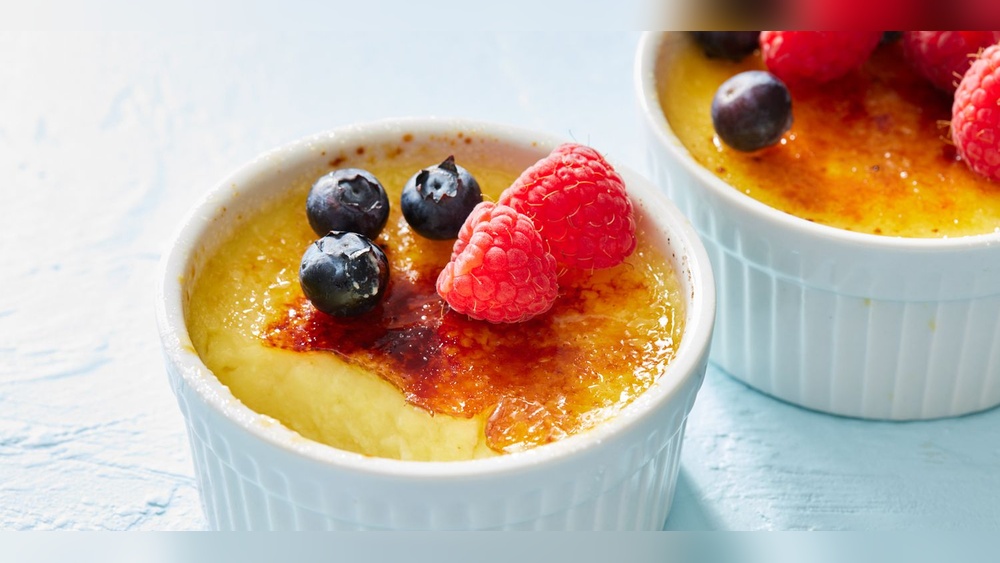
The allure of crème brûlée is undeniable. Its sophisticated simplicity, a velvety custard base crowned with a shatteringly crisp caramelized sugar topping, makes it a quintessential dessert. Often found gracing the menus of fine dining establishments, it might seem intimidating to recreate at home. However, this classic French dessert is surprisingly accessible, requiring just a few key ingredients and a bit of patience. Mastering the technique, particularly achieving that perfect crackle on top, is a rewarding culinary endeavor.
This guide will walk you through every step of making exceptional crème brûlée, from selecting the right ingredients to achieving that iconic caramelized crust. We’ll explore the science behind the perfect custard, common pitfalls to avoid, and tips for elevating your crème brûlée experience.
Whether you’re a seasoned baker or a curious beginner, you’ll gain the expertise needed to confidently whip up this elegant dessert for any occasion.
Key Takeaways
- Quality Ingredients Matter: Use fresh, high-fat dairy (heavy cream, egg yolks) for the richest custard.
- Gentle Heating is Crucial: Avoid scrambling the egg yolks by heating the cream and tempering the eggs slowly.
- Bain-Marie is Your Friend: Baking the custards in a water bath ensures even cooking and a silky texture.
- Chill Thoroughly: Proper chilling is essential for the custard to set and for the sugar to caramelize effectively.
- Caramelization Technique: Use a kitchen torch for the most even and controlled caramelization.
- Patience Pays Off: Allow ample time for chilling and caramelizing for the best results.
The Anatomy Of Perfect Crème Brûlée
At its heart, crème brûlée is a study in contrasts. The smooth, rich custard provides a comforting base, while the brittle, caramelized sugar topping offers a delightful textural and flavor counterpoint. Understanding the role of each component is key to achieving balance and perfection. The foundation is a custard, typically made from a simple mixture of heavy cream, egg yolks, sugar, and vanilla. The richness comes from the fat content in the cream and the emulsifying properties of the egg yolks. The sugar not only sweetens the custard but also contributes to its structure as it cooks.
The magic truly happens with the topping. A thin layer of granulated sugar is sprinkled over the chilled custard and then subjected to intense heat. This process, known as caramelization, transforms the sugar into a hard, glassy shell that cracks satisfyingly under the gentle tap of a spoon. The subtle bitterness of the caramelized sugar cuts through the sweetness and richness of the custard, creating a harmonious flavor profile. While seemingly straightforward, achieving the perfect texture and that signature crack requires attention to detail at every stage.

Essential Ingredients And Equipment
Creating a flawless crème brûlée begins with selecting the finest ingredients and having the right tools for the job. The quality of your components directly impacts the final taste and texture, so don’t skimp on these basics.
Core Ingredients
- Heavy Cream: This is the backbone of your custard. Opt for heavy cream or whipping cream with at least 35% fat content. Lower fat dairy will result in a less rich and potentially watery custard.
- Egg Yolks: These provide richness, emulsification, and structure. For a standard recipe serving 4-6, you’ll typically need 4-6 large egg yolks. Ensure they are fresh and free from any chalaza (the white, stringy bits).
- Sugar: You’ll need sugar for both the custard and the topping. Granulated sugar is standard for the custard. For the topping, granulated sugar is commonly used, though some prefer superfine or caster sugar for easier melting.
- Vanilla: The classic flavor for crème brûlée. Use a vanilla bean for the most authentic and nuanced flavor. If a vanilla bean isn’t available, high-quality vanilla extract or vanilla bean paste can be substituted, though the flavor will be less complex.
- Pinch of Salt: A small amount of salt enhances the overall flavor and balances the sweetness.
Crucial Equipment
- Ramekins: Small, shallow ceramic or glass dishes are ideal. They provide a large surface area for even custard cooking and an optimal canvas for the caramelized topping. Standard ramekins are usually 4-6 ounces.
- Baking Dish: A deep baking dish or roasting pan large enough to hold your ramekins is needed for the water bath (bain-marie).
- Kitchen Torch: This is the most effective tool for achieving a perfectly caramelized, crackly sugar topping. A culinary torch allows for precise control and even heat distribution.
- Fine-Mesh Sieve: Essential for straining the custard mixture to ensure a silky-smooth texture, free from any cooked egg bits or chalaza.
- Whisk: A good quality whisk is needed for incorporating sugar into the cream and tempering the eggs.
- Saucepan: For gently heating the cream mixture.
- Measuring Cups and Spoons: Accurate measurements are important for consistent results.
Step-by-step Guide To Crème Brûlée Mastery
Crafting the perfect crème brûlée involves several distinct stages, each requiring careful execution. By following these steps, you can achieve a dessert that rivals any restaurant’s offering.
Step 1: Preparing The Custard Base
Begin by gently heating your dairy. In a medium saucepan, combine the heavy cream, about half of the granulated sugar (for the custard), and a pinch of salt. If using a vanilla bean, split it lengthwise, scrape out the seeds, and add both the seeds and the pod to the cream mixture. Heat over medium-low heat, stirring occasionally, until the sugar dissolves and the cream is steaming but not boiling. This gentle heating infuses the cream with vanilla and prepares it for the eggs. Remove from heat, cover, and let steep for about 15-20 minutes to fully extract the vanilla flavor. If using vanilla extract, you’ll add it later.
Step 2: Tempering The Egg Yolks
While the cream is steeping, place the egg yolks in a separate medium bowl. Add the remaining granulated sugar for the custard to the yolks. Whisk vigorously until the mixture is pale yellow and slightly thickened. This process is called ribboning, where the mixture falls from the whisk in thick ribbons that slowly dissolve back into the bowl. This step is crucial for incorporating sugar and ensuring the yolks are ready to receive the warm cream without scrambling.
Step 3: Combining Cream And Yolks
Remove the vanilla bean pod from the warm cream. Slowly and gradually, ladle about half a cup of the warm cream mixture into the egg yolk mixture while whisking constantly. This is called tempering and gently raises the temperature of the yolks. Once incorporated, slowly pour the tempered yolk mixture back into the remaining cream in the saucepan, whisking continuously. If you are using vanilla extract, stir it in at this point.
Step 4: Straining And Filling The Ramekins
Pour the custard mixture through a fine-mesh sieve into a pitcher or a bowl with a spout. This removes any potential bits of cooked egg and ensures a perfectly smooth texture. Discard any solids caught in the sieve. Carefully pour the strained custard into your ramekins, filling each one almost to the brim.
Step 5: The Water Bath (bain-marie)
Preheat your oven to 325°F (160°C). Arrange the filled ramekins in the deep baking dish. Carefully pour hot water into the baking dish, ensuring the water comes about halfway up the sides of the ramekins. This water bath creates a humid environment and ensures the custards cook gently and evenly, preventing them from cracking or becoming rubbery.
Step 6: Baking The Custards
Carefully transfer the baking dish with the ramekins and water bath to the preheated oven. Bake for approximately 30-45 minutes. The exact time will depend on the size and depth of your ramekins and your oven. The custards are done when the edges are set, but the centers still have a slight jiggle when gently shaken.
They will continue to set as they cool.
Step 7: Chilling The Custards
Once baked, carefully remove the ramekins from the water bath and place them on a wire rack to cool to room temperature. Once cooled, cover each ramekin tightly with plastic wrap and refrigerate for at least 4 hours, or preferably overnight. This chilling period is critical for the custard to fully set and firm up, which is essential for the next step.
Step 8: Caramelizing The Topping
Just before serving, remove the chilled custards from the refrigerator. Blot any condensation from the surface of the custard with a paper towel. Sprinkle an even, thin layer of granulated sugar over the surface of each custard. Aim for a layer that completely covers the custard without being too thick.
Using a kitchen torch, hold it a few inches above the sugar and move it in a circular motion. The sugar will begin to melt, bubble, and turn a rich amber color. Continue torching until the entire surface is caramelized and has a glossy, hardened appearance. Be careful not to burn the sugar, as this will impart a bitter taste. If you don’t have a torch, you can use your oven’s broiler, but this is trickier to control and can sometimes heat the custard too much.
Troubleshooting Common Crème Brûlée Issues
Even with careful preparation, sometimes things don’t go exactly as planned. Here are some common issues and how to address them.
Custard Is Rubbery Or Overcooked
- Cause: The custard was overheated during baking or cooked at too high a temperature.
- Solution: Always use a water bath for even cooking. Bake at a lower temperature (325°F/160°C) and watch for the slight jiggle in the center. For future batches, reduce the baking time slightly. Over-whisking the egg yolks can also incorporate too much air, leading to a less smooth texture.
Custard Is Watery Or Won’t Set
- Cause: Insufficient baking time, incorrect dairy used, or not enough egg yolks.
- Solution: Ensure you’re using heavy cream and the correct number of egg yolks. Bake until the edges are set and the center still has a slight wobble; it will firm up upon chilling. If it’s still too liquid after chilling, it may need a bit more baking time in the future, or perhaps an extra yolk.
Sugar Topping Is Uneven Or Burnt
- Cause: Uneven sugar distribution, torch held too close or in one spot for too long.
- Solution: Ensure a thin, even layer of sugar. When torching, keep the flame moving constantly in a circular motion a few inches above the surface. If a spot burns, you can try to scrape it off and re-sugar, but it’s best to avoid burning in the first place. A superfine sugar might melt more evenly.
Cracks In The Custard Surface
- Cause: Over-baking or rapid temperature changes.
- Solution: Avoid over-baking. Allow custards to cool gradually before refrigerating. Ensure the oven temperature is accurate.
Variations And Flavor Enhancements
While the classic vanilla crème brûlée is a timeless favorite, there are numerous ways to experiment with flavors and create unique variations. These additions can elevate your dessert and cater to different palates.
Infusing The Cream
The most straightforward way to add flavor is by infusing the cream during the initial heating stage. Consider these additions:
- Citrus Zest: Add strips of lemon, orange, or lime zest along with the vanilla bean. Remove the zest before tempering the eggs.
- Herbs: A sprig of lavender, rosemary, or mint can impart a subtle, aromatic note. Steep with the cream and remove before proceeding.
- Spices: Add a cinnamon stick, a few cardamom pods, or a slice of ginger to the cream.
- Coffee or Tea: Steep a tablespoon of coffee beans or a tea bag (like Earl Grey) in the warm cream.
Incorporating Extracts And Liqueurs
For a more pronounced flavor, stir in extracts or liqueurs after tempering the eggs and before straining.
- Almond Extract: A few drops can add a lovely nutty depth.
- Coffee Extract: Enhances the richness.
- Liqueurs: A tablespoon or two of Grand Marnier, Frangelico, Amaretto, or Irish cream liqueur can add a sophisticated twist.
Adding Textures And Toppings
Beyond the classic sugar crust, consider these additions:
- Fruit Purees: Swirl a small amount of berry puree into the custard before baking.
- Chocolate: Melt a small amount of dark chocolate into the warm cream mixture.
- Spiced Sugar: Mix a pinch of cinnamon, nutmeg, or cardamom into the sugar used for the topping.
A particularly elegant variation is a lavender crème brûlée. Infuse the cream with a teaspoon of culinary lavender buds. The floral notes pair beautifully with the rich custard and caramelized sugar, creating a sophisticated dessert that’s perfect for special occasions. Another delightful option is a chocolate-orange crème brûlée. Add finely grated orange zest to the cream and a few tablespoons of melted dark chocolate to the mixture after tempering. The combination of rich chocolate and bright citrus is always a winner.
The Science Of Sugar Caramelization
The iconic crack of a perfectly caramelized crème brûlée is a result of a fascinating chemical process. Caramelization is the browning of sugar that occurs when it is heated to a sufficiently high temperature. For sucrose (table sugar), this process begins around 320°F (160°C). As the sugar heats, its molecules break down and reform into hundreds of new compounds, including aldehydes and ketones. These compounds are responsible for the characteristic brown color and complex flavors, which range from nutty and buttery to slightly bitter.
The key to achieving the perfect crust lies in the controlled application of heat. A kitchen torch is ideal because it delivers intense, direct heat to a small surface area, causing the sugar to melt and caramelize rapidly without significantly heating the custard beneath. This prevents the custard from becoming warm or even cooking further, which would compromise its chilled, set texture. If the sugar is heated too slowly or unevenly, it can result in a sticky, uneven crust or, worse, burn and become acrid. The goal is a thin, even layer of hard, glassy caramel that shatters cleanly.
Comparing Caramelization Methods
When it comes to achieving that signature brittle topping, there are a few methods, each with its pros and cons. The choice often depends on the equipment available and personal preference.
Kitchen Torch Vs. Broiler
| Method | Pros | Cons | Best For |
|---|---|---|---|
| **Kitchen Torch** | Precise control, even browning, minimal heating of custard. | Requires specialized equipment, can be slow for large batches. | Achieving the classic, perfect crackly crust consistently. Ideal for home cooks and professionals alike. |
| **Oven Broiler** | Uses standard kitchen equipment, can caramelize multiple ramekins at once. | Difficult to control, high risk of burning or uneven browning, can overheat custard. | When a torch is unavailable and you’re willing to monitor very closely. Best for smaller quantities. |
| **Hot Pan Method** | Can create a hard caramel quickly. | Requires practice, risk of burning, can be messy, doesn’t work well for deep ramekins. | Experienced cooks looking for a quick alternative, often used for larger dishes rather than individual ramekins. |
In my experience, the kitchen torch is by far the most reliable and user-friendly method for achieving consistently excellent results. It offers unparalleled control, allowing you to achieve that perfect, shatteringly crisp topping without compromising the delicate custard beneath. While the broiler can work in a pinch, the risk of uneven charring or warming the custard is significantly higher.
Serving And Presentation
Crème brûlée is a dessert that truly shines in its presentation. Its elegant simplicity requires minimal adornment, allowing the dessert itself to be the star.
The Perfect Moment
The ideal time to serve crème brûlée is immediately after caramelizing the sugar topping. The contrast between the warm, brittle caramel and the chilled custard is at its peak. The sound of the spoon breaking through the glassy sugar is part of the experience.
Garnishes And Pairings
While the caramelized sugar is the primary garnish, a few subtle additions can enhance the presentation:
- Fresh Berries: A few raspberries, blueberries, or strawberries add a pop of color and freshness.
- Mint Sprig: A single, fresh mint leaf provides a touch of green and a hint of aroma.
- Edible Flowers: For an extra touch of elegance, a small edible flower can be a beautiful addition.
- Powdered Sugar: A very light dusting of powdered sugar around the rim of the ramekin can add a decorative touch, but be careful not to overdo it.
For beverage pairings, a dessert wine like a Sauternes or a late-harvest Riesling complements the sweetness and richness. A strong coffee or an espresso also cuts through the richness beautifully.
Advanced Techniques And Tips
For those looking to refine their crème brûlée skills further, a few advanced techniques can make a significant difference. These tips focus on achieving an even smoother texture and a more refined flavor profile.
Achieving Ultimate Smoothness
- Low and Slow Baking: Ensure your oven is accurately calibrated and use the water bath religiously. The gentler the heat, the smoother the custard.
- Avoid Over-Whisking: Whisk the egg yolks and sugar just until combined and pale, not until frothy. Too much air incorporated can create small bubbles in the custard.
- Second Straining: For an absolutely flawless texture, consider straining the custard mixture a second time.
Perfecting The Caramel Crust
- Thin, Even Layer: Practice applying a consistently thin layer of sugar. Too much sugar will make it difficult to caramelize evenly and can become too hard.
- Sugar Type: While granulated sugar is standard, some chefs prefer turbinado sugar for a slightly richer, molasses note in the caramel, or superfine sugar for a quicker melt. Experiment to find your preference.
- Torch Technique: Master the sweeping motion of the torch. Keep the flame moving and at a consistent distance to ensure even browning.
Make-ahead Strategies
Crème brûlée is an excellent dessert to prepare in advance. The custards can be made up to 2 days ahead and stored, covered, in the refrigerator. However, the sugar topping should only be caramelized immediately before serving. Caramelizing it too early will cause the sugar to absorb moisture from the custard and soften, losing its signature crackle.
Frequently Asked Questions
What Is The Best Type Of Sugar To Use For The Topping?
While granulated sugar is the most common choice and works well, superfine (caster) sugar melts more quickly and evenly, making it slightly easier to achieve a smooth caramel. Some also prefer turbinado sugar for a slightly deeper, molasses-like flavor in the caramel, though it may not melt as uniformly.
Can I Make Crème Brûlée Without A Kitchen Torch?
Yes, you can use your oven’s broiler. Place the sugared ramekins on a baking sheet and position them a few inches under a preheated broiler. Watch them *very* closely, as the sugar can go from perfectly caramelized to burnt in seconds. Rotate the baking sheet for even browning. This method carries a higher risk of overheating the custard.
How Do I Prevent The Sugar Topping From Becoming Soft?
The key is to caramelize the sugar immediately before serving. Sugar is hygroscopic, meaning it absorbs moisture from the air and the custard. Once caramelized, the sugar layer will begin to soften within minutes of exposure to the custard. For the best crack, serve within 5-10 minutes of torching.
How Many Egg Yolks Should I Use For A Richer Custard?
For a richer, more decadent custard, you can increase the ratio of egg yolks to cream. A common ratio is 1 yolk per 1/2 cup of cream, but you can experiment with up to 1. 5 or even 2 yolks per 1/2 cup of cream for an exceptionally rich result.
Be mindful that more yolks can lead to a slightly firmer set.
What Are The Main Differences Between Crème Brûlée And Flan (crème Caramel)?
The primary difference lies in their preparation and texture. Crème brûlée has a custard base that is baked in a water bath and then topped with a caramelized sugar crust applied just before serving. Flan (crème caramel) has a caramel sauce that is poured into the ramekin *before* the custard mixture, so the caramel liquefies and forms a sauce at the bottom during baking. Flan typically also uses whole eggs or a combination of eggs and yolks, and often includes milk in addition to cream, resulting in a slightly different texture.
The classic crème brûlée, with its rich custard and shatteringly crisp topping, remains a timeless dessert for a reason. By understanding the fundamental techniques, using quality ingredients, and paying attention to the details, you can consistently recreate this elegant dish in your own kitchen.
Whether you stick to the traditional
Leave a Reply