

The humble egg, a culinary staple, offers a wealth of protein and versatility. While traditional stovetop methods for boiling eggs are well-known, the convenience of the microwave often leads to a pressing question: can you truly make hard-boiled eggs in the microwave? The answer is a resounding yes, but it comes with a crucial caveat, safety first. Unlike conventional boiling, microwaving eggs requires a specific approach to prevent potentially explosive outcomes.
This guide will demystify the process, offering a step-by-step breakdown of how to achieve perfectly cooked, hard-boiled eggs using your microwave, while emphasizing the safety precautions that are paramount. We’ll explore the science behind why certain methods work, common pitfalls to avoid, and how to ensure consistently delicious results for your breakfast, salads, or snacks.
Key Takeaways
- Microwaving eggs is possible but requires careful preparation to prevent explosions.
- Never microwave an egg in its shell without piercing it or using a specialized microwave-safe egg cooker.
- Water is essential for even cooking and steam generation when cooking eggs in the microwave.
- Lower power settings and shorter cooking times are key to avoiding overcooking and potential safety hazards.
- Cooling eggs immediately in an ice bath is crucial for easy peeling and stopping the cooking process.
- Microwave-cooked eggs may have a slightly different texture than stovetop-boiled eggs.
- Specialized microwave egg cookers offer a more foolproof and safer method.

The Science Behind Microwave Egg Cooking
Microwaves work by agitating water molecules within food, generating heat. When it comes to eggs, this process can become problematic if not managed correctly. The shell of an egg acts as a sealed container. As the water inside the egg heats up and turns to steam, it expands. If this steam has no escape route, the internal pressure builds until the egg explodes, often with considerable force. This is why simply placing a whole, unpierced egg in the microwave is a recipe for disaster.
The key to successful microwave egg cooking lies in creating a controlled environment where steam can escape safely and heat is distributed evenly. This is typically achieved by:
- Piercing the eggshell: Making small holes allows steam to vent.
- Cooking eggs out of their shells: This eliminates the pressure buildup entirely.
- Using water: Water absorbs microwave energy and heats up, creating a steam bath that cooks the egg more gently and evenly. This is a critical component in most safe microwave egg-boiling methods.
Understanding these principles helps explain why certain techniques are recommended and why others are strictly advised against.
Method 1: The Water Bath Technique (out Of Shell)
This is widely considered the safest and most reliable method for making hard-boiled eggs in the microwave, as it completely bypasses the risk of explosion by cooking the egg without its shell. It requires a microwave-safe bowl or ramekin and a bit of water.
Preparing Your Equipment
You will need:
- A microwave-safe bowl or ramekin (deep enough to hold the egg and water).
- A fork or toothpick.
- A small amount of water.
- The egg you intend to cook.
- An ice bath (a bowl filled with ice and water).
Step-by-step Guide
- Crack the Egg: Carefully crack the egg into your microwave-safe bowl or ramekin.
- Pierce the Yolk: Gently pierce the yolk with a fork or toothpick. This prevents the yolk from exploding during cooking. It’s a simple yet vital step for an even cook.
- Add Water: Pour enough water into the bowl to cover the egg completely. This water acts as a heat conductor and steam generator, ensuring the egg cooks evenly without drying out.
- Cover (Optional but Recommended): You can loosely cover the bowl with a microwave-safe plate or lid, leaving a small gap for steam to escape. This helps contain splatters.
- Microwave on Medium Power: Place the bowl in the microwave. Crucially, use a medium power setting (e.g., 50% or 70%). High power can cook the egg too quickly, leading to unevenness or overcooking. Start with 60-90 seconds for a soft-boiled consistency. For hard-boiled, you’ll need longer.
- Check and Continue Cooking: After the initial cooking time, carefully remove the bowl (it will be hot!). Check the egg’s consistency. If it’s not yet firm, return it to the microwave for additional 30-second intervals, checking after each one. The exact time will vary depending on your microwave’s wattage and the desired doneness. For a fully hard-boiled egg, aim for a total cooking time of approximately 2 to 3 minutes, divided into shorter bursts.
- Immediate Cooling: Once the egg reaches your desired firmness, immediately transfer it to an ice bath. This stops the cooking process instantly, preventing a rubbery texture and making it easier to peel. Let it cool for at least 5 minutes.
- Peel and Serve: Gently peel the cooled egg. It should slide out of its shell relatively easily.
Pro Tip: For multiple eggs, use a larger bowl and ensure each egg is fully submerged in water. You may need to increase the cooking time slightly.
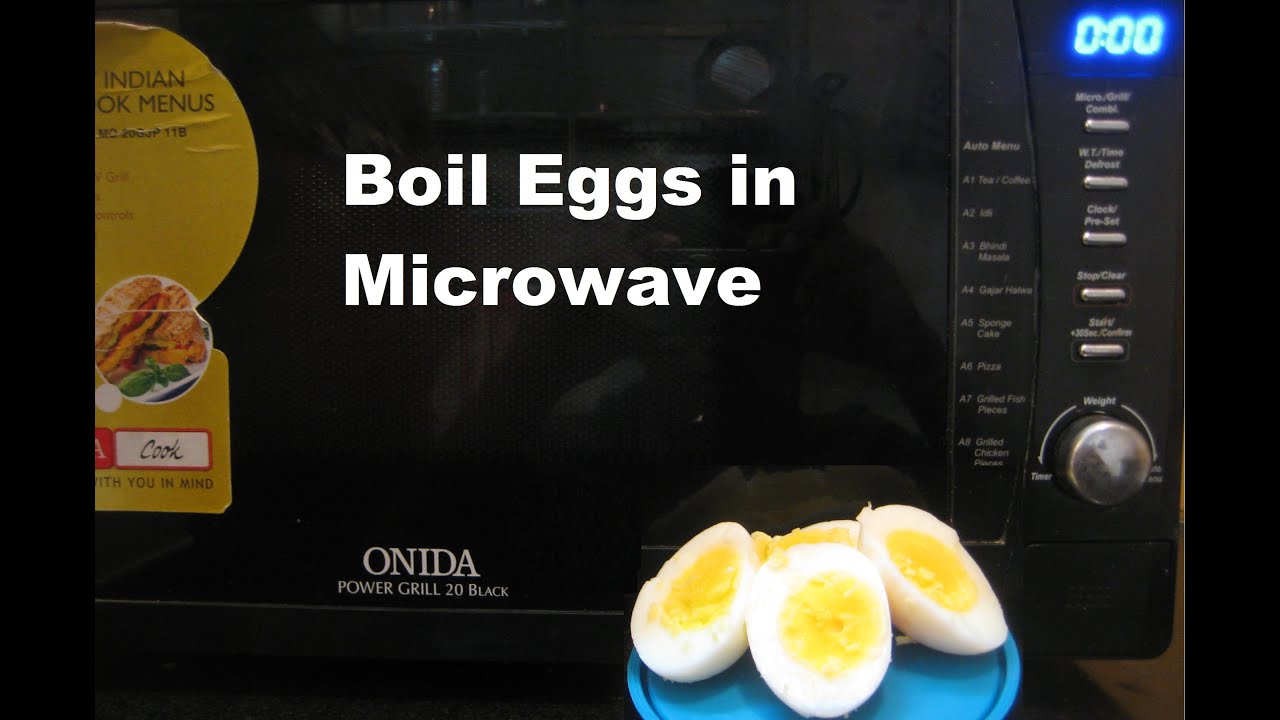
Method 2: The Pierced Whole Egg Technique (use With Extreme Caution)
This method attempts to replicate stovetop boiling by cooking the egg within its shell in the microwave. It is inherently riskier and requires meticulous attention to detail. If not done correctly, the egg can and likely will explode. I strongly recommend the out-of-shell method for safety and consistency. However, for those determined to try this method, here’s how it’s *supposed* to be done.
Essential Safety Precautions
- NEVER microwave an egg in its shell without piercing it. This is non-negotiable.
- Use a microwave-safe container that holds water. Do not place the egg directly on the microwave turntable.
- Ensure the egg is fully submerged in water.
- Use a medium power setting.
- Be prepared for potential failure. Have a plan for cleaning up if an explosion occurs.
- Always use a toothpick or pin to pierce the shell. Make multiple small holes, especially around the larger end of the egg where the air sac is located. Some suggest piercing both ends.
- Consider pre-piercing the egg before heating.
Step-by-step Guide (with Extreme Caution)
- Prepare the Egg: Take a raw egg and carefully pierce the shell in at least 2-3 places using a sharp pin or toothpick. Focus on making small holes, particularly around the wider end. Some sources suggest piercing both the top and bottom.
- Prepare the Water Bath: Fill a microwave-safe bowl or mug with enough water to completely submerge the egg.
- Submerge the Egg: Gently place the pierced egg into the water. Ensure it is fully covered.
- Microwave on Medium Power: Place the bowl in the microwave. Set the power to 50%. Start with a cooking time of 3-4 minutes.
- Rest and Check: After the initial cooking time, let the egg sit in the hot water inside the microwave for another 1-2 minutes. DO NOT REMOVE IT IMMEDIATELY. This resting period allows the residual heat to continue cooking the egg gently.
- Careful Removal: Using a spoon, very carefully remove the egg from the hot water. Be prepared for the possibility of it still being undercooked or, worse, having exploded internally.
- Immediate Cooling: Place the egg in an ice bath for at least 5-10 minutes to stop the cooking and aid in peeling.
- Peeling: Attempt to peel the egg. If it’s difficult to peel, it might be a sign of overcooking or uneven cooking.
Warning: This method is significantly less predictable and carries a higher risk of explosion and uneven cooking compared to the out-of-shell method. The internal structure of the egg can be compromised by the piercing, leading to a less desirable texture.
Method 3: Specialized Microwave Egg Cookers
For those who frequently want microwave-cooked eggs, investing in a specialized microwave egg cooker is the most practical and safest solution. These gadgets are designed specifically to overcome the challenges of microwaving eggs. They typically consist of a container with compartments for individual eggs and a lid with vents.
How They Work
Microwave egg cookers usually work by creating a steam environment. You add a small amount of water to the base of the cooker, place the eggs (often still in their shells, but the cooker design accounts for venting) or the egg mixture into the designated compartments, and then microwave according to the manufacturer’s instructions.
The water heats up, producing steam that gently and evenly cooks the eggs.
Benefits Of Using A Microwave Egg Cooker
- Safety: Designed to prevent explosions by allowing controlled steam release.
- Convenience: Often allows cooking multiple eggs at once.
- Consistency: Provides more predictable results than makeshift methods.
- Versatility: Some models can be used for poaching or scrambling as well.
Popular Microwave Egg Cooker Options
While specific models change, common types include:
- Single Egg Poachers: Small, individual cups designed for poaching eggs.
- Multi-Egg Boilers: Devices with multiple indentations to hold eggs in their shells.
- All-in-One Cookers: Some can handle boiling, poaching, and scrambling.
When purchasing, look for BPA-free materials and check reviews for ease of cleaning and durability. Always follow the manufacturer’s specific instructions for water levels, power settings, and cooking times, as these can vary significantly between products. For instance, a popular choice might be a silicone egg boiler that allows you to place eggs in their shells, and the design facilitates safe steam escape.
Achieving The Perfect Doneness In The Microwave
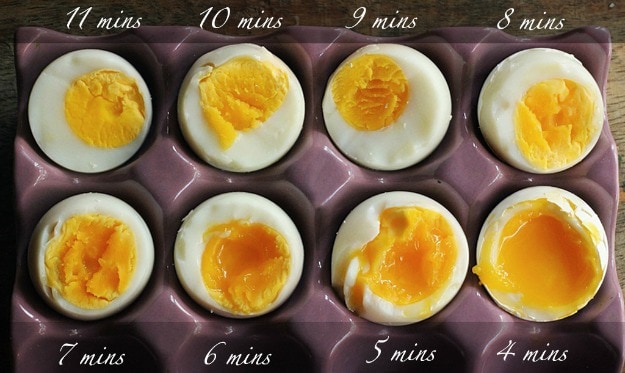
Microwave cooking times are notoriously variable due to differences in microwave wattage, the size of the egg, and the starting temperature of the egg. Therefore, experimentation is key to finding your perfect hard-boiled egg in the microwave.
Factors Affecting Cooking Time
- Microwave Wattage: Higher wattage microwaves cook faster. A 1200-watt microwave will require less time than a 700-watt model.
- Egg Size: Larger eggs (jumbo) will need slightly longer cooking times than medium or small eggs.
- Starting Temperature: Eggs straight from the refrigerator will take longer to cook than room-temperature eggs.
- Water Amount: Sufficient water is crucial for even cooking. Too little water can lead to hot spots and uneven cooking.
- Power Level: Using a lower power setting (e.g., 50-70%) allows for more gentle and even cooking, reducing the risk of overcooking or explosion.
Tips For Consistent Results
- Start Low, Go Slow: Always begin with the lower end of the recommended cooking time and add increments of 30 seconds. It’s easier to add more time than to fix an overcooked egg.
- Use a Timer: Accurately time each cooking interval.
- Consistent Water Level: Maintain the same water level each time you cook.
- Ice Bath is Non-Negotiable: For hard-boiled eggs, the ice bath is essential for stopping the cooking and achieving the right texture.
- Note Your Settings: Once you find the perfect combination of time, power, and water for your microwave, jot it down! This removes the guesswork for future attempts.
- Consider Egg Condition: Older eggs tend to peel more easily, regardless of the cooking method.
Comparing Microwave Vs. Stovetop Hard-boiled Eggs
While the microwave offers speed and convenience, how does it stack up against the traditional stovetop method? Here’s a comparison:
| Feature | Microwave Hard-Boiled Eggs (Out of Shell) | Stovetop Hard-Boiled Eggs |
|---|---|---|
| **Speed** | Very fast (approx. 3-5 minutes total cooking + cooling) | Moderate (approx. 10-12 minutes boiling + cooling) |
| **Safety Risk** | Low (when done out of shell or with proper cooker) | Very low |
| **Ease of Peeling** | Generally good, especially with ice bath | Can be variable; fresh eggs are harder to peel |
| **Texture** | Can sometimes be slightly softer or more delicate | Firm, classic hard-boiled texture |
| **Energy Efficiency** | Potentially more efficient for small batches (1-2 eggs) | More efficient for larger batches |
| **Equipment Needed** | Microwave-safe bowl, water, ice bath | Pot, water, stove |
| **Consistency** | Requires practice to perfect timing for desired doneness | Generally consistent once technique is mastered |
| **Explosion Risk** | Minimal (out of shell) / High (in shell, if done incorrectly) | None |
| **Flavor** | Identical | Identical |
In my experience, the out-of-shell microwave method provides a surprisingly good result that is nearly indistinguishable from stovetop-boiled eggs once peeled, especially when used in dishes like egg salad where the texture is less critical than for a perfectly sliced garnish.
The speed is a significant advantage for a quick protein boost.
Troubleshooting Common Microwave Egg Problems
Even with the best intentions, things can go wrong. Here are some common issues and how to address them:
Problem: Egg Explodes
- Cause: This is almost always due to cooking a whole egg in its shell without piercing it, or insufficient piercing, allowing steam to build up.
- Solution:
- For future attempts: Use the out-of-shell method or a specialized microwave egg cooker. If attempting the pierced whole egg method, ensure thorough piercing and use lower power.
- If it happens: Immediately stop the microwave. Do not open the door until the spinning stops. Carefully remove the bowl containing the exploded egg. Clean the microwave thoroughly, this can be a messy job.
Problem: Egg Is Rubbery Or Overcooked
- Cause: Microwaved for too long, or at too high a power setting.
- Solution:
- For future attempts: Reduce the cooking time in 30-second increments. Always use a medium power setting (50-70%). Ensure the egg is immediately placed in an ice bath to halt the cooking process.
Problem: Egg Is Undercooked Or Runny (yolk Or White)
- Cause: Not microwaved for long enough, or power level too low.
- Solution:
- For future attempts: Increase the cooking time in 30-second increments. Ensure the yolk has been pierced if cooking out of the shell. If using a whole egg method, ensure sufficient cooking time and resting period.
Problem: Egg Has A “rubbery” White
- Cause: Often a result of cooking at too high a power or for too long, causing the proteins to denature too rapidly.
- Solution: Use a lower power setting and shorter, incremental cooking times. The water bath method (out of shell) helps mitigate this.
Problem: Difficult To Peel
- Cause: This is less common with microwave methods but can still occur. It might be due to the rapid cooking process affecting the membrane adhesion or simply using very fresh eggs.
- Solution: Ensure the egg is thoroughly chilled in an ice bath for at least 5-10 minutes. Gently tap the egg all around on a hard surface before peeling, starting from the wider end. Sometimes, adding a teaspoon of baking soda or vinegar to the water when cooking can help, though this is more commonly cited for stovetop methods.
Culinary Uses For Microwave Hard-boiled Eggs
Once you’ve mastered the art of microwave hard-boiled eggs, their applications are as varied as their stovetop counterparts. They are perfect for:
- Quick Breakfasts: Enjoy them plain with a sprinkle of salt and pepper.
- Salads: Slice them onto green salads, Cobb salads, or potato salads.
- Egg Salad Sandwiches: Mash them with mayonnaise, mustard, and seasonings.
- Deviled Eggs: A classic appetizer that’s always a hit.
- Snacks: A portable, protein-rich snack for on-the-go.
- Garnishes: Add a professional touch to soups or other dishes.
The convenience factor of the microwave makes it an excellent option when you need just one or two eggs quickly, without the need to boil a large pot of water. For instance, if you’re making a single serving of avocado toast topped with a sliced egg, the microwave method shines. Similarly, if you’re a solo cook who enjoys a protein-packed lunch salad, the ability to whip up a hard-boiled egg in minutes is invaluable. This aligns with the trend towards smaller, faster meal preparations, much like how compact blenders like the Ninja Foodi Personal Blender are favored for single servings.
Frequently Asked Questions
Can I Microwave A Whole Egg In Its Shell Without Piercing It?
Absolutely not. This is extremely dangerous and will almost certainly result in an explosion, potentially damaging your microwave and causing injury. The steam buildup inside the sealed shell has no escape route.
How Long Does It Take To Hard-boil An Egg In The Microwave?
The time varies significantly based on your microwave’s wattage, the egg size, and the method used. For the out-of-shell method, expect approximately 2-3 minutes of total cooking time, divided into shorter bursts, followed by cooling. For specialized egg cookers, always refer to the manufacturer’s instructions.
Will Microwave-cooked Eggs Taste Different From Stovetop-cooked Eggs?
No, the taste should be identical. The cooking method affects texture and convenience, but not the inherent flavor of the egg.
Is It Safe To Eat Eggs Cooked In The Microwave?
Yes, provided you use a safe method that prevents explosions and ensures the egg is cooked through. The out-of-shell method and certified microwave egg cookers are considered safe. The pierced-shell method carries a risk if not performed correctly.
Can I Use This Method For Soft-boiled Eggs?
Yes, the out-of-shell method is particularly well-suited for achieving soft-boiled eggs. Start with much shorter cooking times, perhaps 60-90 seconds, and check for doneness. The key is to cook just until the white is set but the yolk remains runny. Immediate cooling in an ice bath is still recommended to stop the cooking precisely.
Mastering the microwave for egg preparation, much like understanding the nuances between different blender models such as the Ninja BN751 vs DB751A Pro Plus Duo Blender, involves understanding the equipment and the process. While the stovetop remains a reliable classic, the microwave offers a compelling alternative for speed and convenience, especially when safety precautions are diligently followed. The out-of-shell technique, in particular, provides a safe and effective way to enjoy hard-boiled eggs with minimal fuss, making it a valuable addition to any modern kitchen’s repertoire.
Leave a Reply