

Mastering the art of cooking steak is a culinary journey that transforms a simple cut of meat into a restaurant-quality delight. It’s about understanding the nuances of heat, timing, and technique to achieve that perfect balance of a beautifully seared crust and a tender, juicy interior.
Whether you’re a novice in the kitchen or an experienced home cook looking to refine your skills, this guide will walk you through every step, from selecting the ideal cut to achieving your desired doneness. We’ll demystify the process, providing clear, actionable advice that will elevate your steak-cooking game and impress even the most discerning palates.
Key Takeaways
- Choose the Right Cut: Opt for well-marbled cuts like ribeye, New York strip, or filet mignon for superior flavor and tenderness.
- Proper Seasoning is Crucial: Generously season your steak with salt and pepper at least 30 minutes before cooking, or right before, to enhance flavor and create a crust.
- Master the Sear: Achieve a deep, flavorful crust by using high heat and not overcrowding the pan, allowing for proper caramelization.
- Control the Temperature: Use a meat thermometer to accurately gauge doneness, aiming for specific internal temperatures for rare, medium-rare, medium, and well-done.
- Rest Your Steak: Allowing the steak to rest after cooking is vital for redistributing juices, ensuring a tender and moist result.
- Consider Finishing Techniques: Butter basting or adding aromatics like garlic and herbs can add an extra layer of flavor and richness.

Understanding Steak Cuts: The Foundation Of Flavor
The journey to a perfect steak begins with selecting the right cut. Different cuts come from different parts of the cow, each with its own unique texture, marbling, and flavor profile. Understanding these differences is key to choosing a steak that suits your preference and cooking method.
Prime Cuts For Pan-searing And Grilling
When aiming for that classic steakhouse experience, certain cuts consistently deliver. These are typically the more tender and flavorful sections of the cow.
- Ribeye: Known for its rich, beefy flavor and generous marbling, the ribeye is a favorite among steak enthusiasts. The intramuscular fat (marbling) melts during cooking, basting the meat and creating incredible tenderness and juiciness. It’s forgiving and can withstand higher cooking temperatures.
- New York Strip (Strip Steak, Kansas City Strip): This cut offers a good balance of tenderness and beefy flavor, with a firmer texture than a ribeye. It has a prominent strip of fat along one edge, which adds flavor and moisture.
- Filet Mignon (Tenderloin): The most tender cut, the filet mignon is incredibly lean and buttery. Its mild flavor means it benefits greatly from sauces or a good sear. Because it’s so lean, it can overcook quickly, making temperature control paramount.
- T-Bone and Porterhouse: These are actually two steaks in one, separated by a T-shaped bone. They include both a piece of the tenderloin (filet) and a piece of the strip steak. A Porterhouse is simply a larger T-bone with a bigger portion of the tenderloin. The bone itself adds flavor during cooking.
Other Excellent Choices
While the prime cuts are popular, other options can yield delicious results with the right approach.
- Sirloin: A more budget-friendly option, sirloin is leaner than ribeye or strip but still offers good flavor. It can be a bit chewier if not cooked properly, so marinating or a slightly shorter cooking time is often recommended.
- Flank Steak and Skirt Steak: These are thinner, flatter cuts that are very flavorful but can be tougher. They are best cooked quickly over high heat (like grilling or pan-searing) and sliced thinly against the grain to maximize tenderness. Marinating is often beneficial.
The Importance Of Marbling
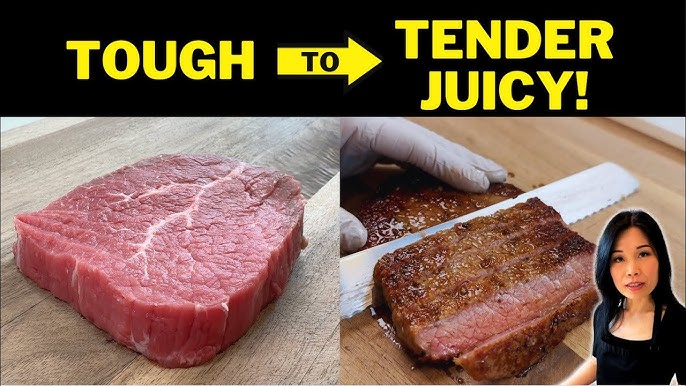
Marbling refers to the small flecks of intramuscular fat within the muscle. These fat deposits are crucial for steak quality. As the steak cooks, this fat melts, lubricating the muscle fibers and contributing significantly to the steak’s juiciness, tenderness, and overall flavor. Steaks with good marbling, like a well-aged ribeye, are generally considered superior.
Preparing Your Steak For Perfection
Once you’ve chosen your cut, proper preparation is key to unlocking its full potential. This involves bringing the steak to the right temperature, drying it thoroughly, and seasoning it effectively.
Bringing Steak To Room Temperature
Pro Tip: Allow your steak to sit at room temperature for at least 30-60 minutes before cooking (depending on thickness). This allows the steak to cook more evenly, preventing a cold center when the outside is perfectly seared. A steak that is too cold will take longer to cook, risking overcooking the exterior while the interior remains underdone.
The Art Of Drying
Moisture is the enemy of a good sear. A wet steak will steam rather than sear, preventing the development of that coveted deep brown crust.
- Pat Dry: Use paper towels to thoroughly pat the entire surface of the steak dry. Get into all the nooks and crannies.
- Air Dry (Optional but Recommended): For an even better crust, place the dried steak on a wire rack set over a baking sheet and let it air dry in the refrigerator for an hour or two, or even overnight for thicker cuts. This process, known as dry-aging on a small scale, further removes surface moisture and can even contribute to a more intense flavor.
Seasoning Strategies
Seasoning is where personal preference truly shines, but a few fundamental principles apply to most steak preparations.
- Salt: Use a coarse salt like Kosher salt or sea salt. The larger crystals adhere better and are easier to distribute evenly.
- Timing:
- At least 30 minutes before cooking (or longer): Salting well in advance allows the salt to penetrate the meat, drawing out some moisture initially, which then gets reabsorbed, seasoning the steak from within and helping to tenderize it.
- Immediately before cooking: This method relies on the salt creating a crust on the surface during the searing process.
- Avoid salting 5-20 minutes before cooking: This is the “danger zone” where salt draws moisture to the surface without enough time for it to be reabsorbed, leading to a less juicy steak.
- Pepper: Freshly ground black pepper adds a pungent kick. It’s best to add pepper just before cooking, as it can burn at high temperatures if added too early.
- Other Seasonings: Garlic powder, onion powder, or your favorite steak rubs can be added. However, for showcasing the pure flavor of a good steak, salt and pepper are often all you need.
Cooking Methods: Pan-searing Vs. Grilling
The two most popular methods for cooking steak at home are pan-searing and grilling. Each offers a distinct advantage in achieving that perfect steak.
Pan-searing: The Indoor Champion
Pan-searing is ideal for achieving a consistent, dark crust, especially when the weather isn’t cooperating for grilling. It also allows for easy butter basting.
Choosing The Right Pan
A heavy-bottomed pan is essential for maintaining a consistent high heat.
- Cast Iron Skillet: This is the gold standard for searing steaks. Its excellent heat retention and even heating capabilities create a superior crust.
- Stainless Steel Pan: A good alternative, though it may require slightly more attention to maintain even heat. Avoid non-stick pans, as they typically cannot handle the high temperatures required for a proper sear.
The Searing Process
- Preheat the Pan: Place your skillet over medium-high to high heat. Let it get very hot. This is crucial for achieving a good sear.
- Add Fat: Once the pan is hot, add a high smoke point oil like canola, grapeseed, or avocado oil. You want enough to lightly coat the bottom of the pan. The oil should shimmer; if it smokes excessively, the pan is too hot.
- Sear the Steak: Carefully place the seasoned steak into the hot pan. You should hear a loud sizzle.
- Don’t Move It: Let the steak sear undisturbed for 2-4 minutes per side, depending on thickness, to develop a deep brown crust. Resist the urge to move it around.
- Flip and Sear: Flip the steak and sear the other side for another 2-4 minutes.
- Sear the Edges: For thicker steaks, use tongs to hold the steak on its sides to sear the edges, especially the fat cap.
Butter Basting (optional But Recommended)
Once both sides are seared and the steak is nearing your desired doneness, reduce the heat to medium. Add a knob of butter, a few cloves of smashed garlic, and some hardy herbs like rosemary or thyme to the pan.
Tilt the pan and use a spoon to continuously baste the steak with the melted, infused butter for 1-2 minutes. This adds incredible flavor and helps cook the steak evenly.
Grilling: The Outdoor Classic
Grilling imparts a distinct smoky flavor and those beautiful grill marks that are synonymous with a great steak.
Setting Up Your Grill
- Clean the Grates: Ensure your grill grates are clean to prevent sticking and off-flavors.
- Two-Zone Heat: For most steaks, especially thicker cuts, set up a two-zone fire. This means having one side of the grill with direct, high heat and the other side with indirect, lower heat. This allows you to sear the steak over direct heat and then move it to the cooler side to finish cooking gently without burning.
The Grilling Process
- Preheat the Grill: Get your grill to a high temperature (around 450-500°F or 230-260°C).
- Sear Over Direct Heat: Place the seasoned steak over the hottest part of the grill. Sear for 2-4 minutes per side, creating those desirable grill marks.
- Move to Indirect Heat: Once seared, move the steak to the cooler, indirect heat side of the grill. Close the lid.
- Cook to Doneness: Continue cooking on the indirect side until the steak reaches your desired internal temperature, flipping occasionally.

Achieving Perfect Doneness: Temperature Is Key
The most reliable way to cook a steak to your exact preference is by using a meat thermometer. While visual cues and timing can be helpful, a thermometer provides objective accuracy. Always cook your steak to a temperature about 5°F (3°C) *below* your target, as it will continue to cook while resting (this is called carryover cooking).
Here are the target internal temperatures for various levels of doneness, measured in the thickest part of the steak, away from the bone:
| Doneness | Target Internal Temperature (°F) | Target Internal Temperature (°C) | Description |
|---|---|---|---|
| **Rare** | 120-125°F | 49-52°C | Cool to warm red center, very tender. |
| **Medium-Rare** | 130-135°F | 54-57°C | Warm red center, most popular for flavor and tenderness. |
| **Medium** | 135-145°F | 57-63°C | Warm pink center, firmer texture. |
| **Medium-Well** | 145-155°F | 63-68°C | Slightly pink center, noticeably firmer. |
| **Well-Done** | 160°F+ | 71°C+ | No pink, firmest texture, least juicy. (Generally not recommended for prime cuts) |
Note: For food safety, the USDA recommends a minimum internal temperature of 145°F (63°C) for whole cuts of beef, pork, veal, and lamb, followed by a three-minute rest time. Always consult current food safety guidelines.
Using A Meat Thermometer
- Instant-Read Thermometer: These are the fastest and most accurate. Insert the probe into the thickest part of the steak, ensuring it doesn’t touch bone or fat pockets.
- Leave-In Probe Thermometer: Some thermometers have a probe that stays in the meat during cooking, with a cable leading to a base unit outside the grill or oven, allowing you to monitor temperature without opening the lid.
The Crucial Resting Period
This step is often overlooked, but it’s as important as the cooking itself. After removing the steak from the heat, rest it on a clean cutting board or warm plate for 5-10 minutes (longer for very thick cuts).
Why is resting so vital? When steak cooks, the muscle fibers tighten, and the juices are pushed towards the center. If you cut into the steak immediately, these juices will spill out onto the plate, leaving the meat dry. Resting allows the muscle fibers to relax and the juices to redistribute evenly throughout the steak.
This results in a more tender, moist, and flavorful bite. Tent it loosely with foil to keep it warm, but avoid wrapping it tightly, which can steam the crust you worked so hard to create.
Finishing Touches And Serving
With your steak perfectly cooked and rested, it’s time for the final presentation.
Slicing Your Steak
Always slice steak against the grain. Look closely at the steak; you’ll see the muscle fibers running in a particular direction. Slicing perpendicular to these fibers shortens them, making the meat much more tender to chew. Use a sharp knife for clean cuts.
Accompaniments
Classic steakhouse sides like mashed potatoes, creamed spinach, roasted asparagus, or a simple green salad complement steak beautifully. A well-made sauce, such as a peppercorn sauce, béarnaise, or red wine reduction, can elevate the dish further.
Doneness Examples And Internal Temperatures
Let’s look at how cooking time might vary based on steak thickness and desired doneness, assuming a 1. 5-inch thick steak cooked over high heat. These are *estimates*; always rely on your thermometer.
| Doneness | Pan-Searing Time (Total) | Grilling Time (Total) | Target Internal Temp (Before Rest) |
|---|---|---|---|
| **Rare** | 6-8 minutes | 6-8 minutes | 125°F (52°C) |
| **Medium-Rare** | 8-10 minutes | 8-10 minutes | 135°F (57°C) |
| **Medium** | 10-12 minutes | 10-12 minutes | 145°F (63°C) |
| **Medium-Well** | 12-14 minutes | 12-14 minutes | 155°F (68°C) |
Example: For a medium-rare steak, you’d aim to pull it off the heat when the thermometer reads 135°F (57°C). After resting for 5-10 minutes, its internal temperature will rise to around 140-145°F (60-63°C), achieving perfect medium-rare.
Troubleshooting Common Steak Problems
Even with the best intentions, things can sometimes go awry. Here are solutions to common issues:
Steak Is Tough Or Chewy
- Cause: Overcooking, slicing with the grain, or choosing a naturally tougher cut without proper preparation.
- Solution: Cook to the correct temperature (medium-rare is usually best for tenderness), always slice against the grain, and consider marinades for leaner or tougher cuts.
Steak Lacks A Good Sear (pale And Gray)
- Cause: Pan or grill not hot enough, steak was too wet, or the pan was overcrowded.
- Solution: Ensure your cooking surface is screaming hot before adding the steak. Pat the steak thoroughly dry. Cook steaks in batches if necessary to avoid lowering the pan temperature.
Steak Is Overcooked
- Cause: Cooked for too long, or carryover cooking wasn’t accounted for.
- Solution: Use a meat thermometer diligently and remove the steak from the heat 5°F (3°C) below your target temperature. Practice makes perfect in judging timing.
Steak Is Undercooked
- Cause: Not cooked long enough, or the internal temperature wasn’t reached.
- Solution: Extend the cooking time, checking the internal temperature frequently. Ensure your heat source is consistent.
A Steak Cooking Workflow Example
Let’s walk through preparing a 1. 5-inch thick New York Strip steak for medium-rare doneness using the pan-searing method.
- Preparation (1 hour before cooking): Remove the steak from the refrigerator and let it come to room temperature. Pat it thoroughly dry with paper towels. Season generously with Kosher salt and freshly ground black pepper.
- Heating the Pan (5 minutes before cooking): Place a cast iron skillet over medium-high heat. Let it preheat until it’s very hot. Add 1-2 tablespoons of avocado oil.
- Searing (8-10 minutes total): Carefully place the steak in the hot skillet. Sear for 3-4 minutes without moving it until a deep brown crust forms. Flip the steak and sear the other side for another 3-4 minutes. Use tongs to sear the edges for about 30 seconds each.
- Butter Basting (Optional, 1-2 minutes): Reduce heat to medium. Add 2 tablespoons of butter, 2 smashed garlic cloves, and a sprig of rosemary to the pan. Tilt the pan and spoon the melted butter over the steak continuously.
- Checking Temperature: Insert an instant-read thermometer into the thickest part. Aim to pull the steak off the heat when it reads 135°F (57°C).
- Resting (5-10 minutes): Transfer the steak to a clean cutting board or warm plate. Tent loosely with foil.
- Slicing and Serving: After resting, slice the steak against the grain and serve immediately.
This methodical approach ensures that each step contributes to the final, delicious outcome. The consistency of a good cast iron pan, as often discussed in kitchenware comparisons like Ninja Professional Countertop vs Ultracrush Professional Blender Comparison, highlights how specific tools can significantly impact results in cooking.
Frequently Asked Questions
What Is The Best Oil To Use For Searing Steak?
The best oils for searing steak have a high smoke point, meaning they can withstand high heat without burning and producing unpleasant flavors. Excellent choices include avocado oil, grapeseed oil, canola oil, and peanut oil. Olive oil, especially extra virgin olive oil, has a lower smoke point and is generally not ideal for searing at very high temperatures, though light or refined olive oil can sometimes be used.
How Can I Tell If My Steak Is Done Without A Thermometer?
While a thermometer is the most accurate tool, experienced cooks can gauge doneness by touch. Gently press the steak with your finger; compare the resistance and firmness to the fleshy part of your palm below your thumb. For example, a rare steak feels similar to touching the fleshy part of your palm when your thumb and index finger are lightly touching.
A medium-rare steak feels like touching the palm when your thumb and middle finger are touching, and so on. However, this method requires practice and can vary based on the cut and thickness of the steak, making a thermometer the most reliable option for consistent results.
Should I Cook Steak With The Bone In Or Out?
Cooking steak with the bone in, such as a T-bone or Porterhouse, can add significant flavor to the meat as the bone marrow and connective tissues render during cooking. The bone also acts as an insulator, helping the meat cook more evenly and potentially staying warmer for longer.
However, bone-in steaks can sometimes be trickier to cook evenly due to the bone’s presence, potentially requiring slightly longer cooking times or careful heat management. Boneless steaks, like a strip or ribeye, offer more predictable cooking times and are often easier to handle.
Ultimately, the choice depends on personal preference for flavor and convenience.
How Do I Get Restaurant-quality Grill Marks?
To achieve those coveted crosshatch grill marks, preheat your grill to high heat and ensure the grates are clean. Place the seasoned steak onto the hot grates, positioning it at a 45-degree angle to the grill bars. Sear for 2-3 minutes until you have a good char.
Then, without lifting the steak, rotate it 90 degrees on the same side and sear for another 2-3 minutes. Flip the steak and repeat the process on the other side to create the crosshatch pattern. For the best results, avoid moving the steak unnecessarily once it’s placed on the grill.
Can I Reverse Sear My Steak?
Yes, reverse searing is an excellent technique, especially for thicker cuts (1.5 inches or more), and is highly recommended
Leave a Reply