

Fondant is a magical medium in the world of cake decorating. Its smooth, pliable texture allows for the creation of stunning, professional-looking cakes, from intricate floral arrangements to sharp, clean edges on tiered masterpieces. While many bakers opt to purchase pre-made fondant, understanding how to make it from scratch can open up a new level of creativity and cost-effectiveness.
Homemade fondant often boasts a superior taste and texture compared to its store-bought counterparts, giving you complete control over its flavor and consistency.
This guide will walk you through the essential steps of creating fondant from scratch, covering the foundational recipes, the nuances of achieving the perfect texture, and tips for troubleshooting common issues. Whether you’re a seasoned decorator looking to refine your skills or a beginner eager to dive into the world of edible artistry, mastering homemade fondant is a rewarding endeavor that will elevate your baking projects to new heights.
Key Takeaways
- Fundamental Ingredients: The core components of most fondant recipes are powdered sugar, gelatin (or an alternative for vegan versions), water, and corn syrup or glucose.
- Achieving Smoothness: Proper kneading and resting are crucial for a smooth, pliable fondant that is easy to work with.
- Flavoring and Coloring: Homemade fondant allows for custom flavor infusions and vibrant coloring, offering more creative freedom than store-bought options.
- Storage is Key: Properly wrapped and stored fondant can last for several weeks, ensuring you always have this decorating staple on hand.
- Troubleshooting Common Issues: Understanding how to fix sticky, dry, or crumbly fondant is essential for a successful decorating experience.
The Science Behind Fondant
Fondant is essentially a sugar paste, with its structure and texture primarily determined by the interaction of its key ingredients. The powdered sugar provides the bulk and sweetness, acting as the primary solid component. Gelatin, when dissolved in water and then heated, forms a gel matrix. As this mixture cools and is combined with the powdered sugar, it creates a pliable, elastic dough. Corn syrup or glucose syrup plays a vital role in preventing crystallization of the sugar, ensuring a smooth, non-gritty texture, and also contributes to the fondant’s flexibility. The water acts as the solvent for the gelatin and helps to hydrate the sugar.
The process of making fondant involves carefully dissolving the gelatin and then gradually incorporating the powdered sugar. The heat from the gelatin mixture helps to melt some of the sugar, creating a smooth paste. As the mixture cools, the gelatin sets, and the addition of fat (like shortening or glycerine, though not always present in basic recipes) can further enhance its pliability and prevent it from drying out too quickly. The kneading process is critical; it develops the elasticity of the fondant, making it easier to roll, shape, and drape over cakes without tearing.
Essential Ingredients And Their Roles
Creating a successful batch of fondant relies on understanding the function of each ingredient. While recipes can vary slightly, these are the stalwarts of most homemade fondant preparations.
Powdered Sugar (confectioners’ Sugar)
This is the backbone of your fondant. It’s essentially finely ground granulated sugar with a small amount of cornstarch added to prevent clumping. The fineness of the powdered sugar is crucial for achieving a smooth texture. If your powdered sugar is lumpy, sifting it is an absolute must.
A standard recipe typically uses between 2 to 4 pounds of powdered sugar.
Gelatin
Gelatin is a protein derived from collagen, typically sourced from animal connective tissues. It’s what gives fondant its characteristic chewiness and elasticity. Unflavored gelatin powder is readily available in most grocery stores. For vegan or vegetarian fondant, agar-agar or other plant-based gelling agents can be used as a substitute, though they may require slightly different preparation methods and can sometimes result in a slightly different texture.
The amount of gelatin used directly impacts the firmness and elasticity of the final product.
Water
Filtered or distilled water is often recommended to avoid any impurities or minerals that might affect the color or flavor of the fondant. It serves as the liquid base for dissolving the gelatin and hydrating the sugar.
Corn Syrup Or Glucose Syrup
This is a key ingredient for achieving a smooth, pliable fondant that doesn’t dry out or become brittle. Corn syrup (or its more refined form, glucose syrup) is an invert sugar. Invert sugars are created by breaking down sucrose into glucose and fructose.
This process inhibits the formation of large sugar crystals, which would otherwise lead to a grainy or crackled fondant. It also adds a subtle sweetness and contributes to the fondant’s elasticity.
Glycerine (optional But Recommended)
Food-grade glycerine is a humectant, meaning it attracts and retains moisture. Adding a small amount can significantly improve the fondant’s pliability and keep it from drying out too quickly during use. It’s particularly useful in warmer, drier climates.
Flavoring (optional)
While fondant has a mild sweetness on its own, you can infuse it with various flavors. Extracts like vanilla, almond, lemon, or peppermint are common choices. Ensure you use oil-based flavorings sparingly, as they can alter the fondant’s texture. Water-based extracts are generally preferred.
Shortening Or Butter Flavor (optional)
Some recipes include a small amount of vegetable shortening or a butter-flavored extract to impart a richer taste and improve texture. This is entirely optional and depends on your preference.

The Classic Marshmallow Fondant Recipe
Marshmallow fondant is a popular choice for home bakers due to its simplicity and excellent texture. It often yields a softer, more pliable fondant compared to traditional gelatin-based recipes, making it very forgiving for beginners.
Yields: Approximately 2 lbs
Prep time: 20 minutes
Resting time: 2-4 hours (or overnight)
Ingredients:
- 16 ounces (about 450g) mini marshmallows
- 2 tablespoons water
- 1 tablespoon vegetable shortening, plus more for greasing
- 1 teaspoon vanilla extract (optional)
- 2 pounds (about 900g) powdered sugar, sifted, plus more for dusting
Equipment:
- Large microwave-safe bowl
- Rubber spatula or wooden spoon
- Measuring cups and spoons
- Sifter
- Clean work surface
- Plastic wrap
Instructions:
- Melt the Marshmallows: Place the mini marshmallows and water in a large microwave-safe bowl. Microwave on high for 30-second intervals, stirring well after each, until the marshmallows are completely melted and smooth. Be careful not to overheat, as they can scorch quickly.
- Add Flavor and Fat: Stir in the tablespoon of vegetable shortening and the vanilla extract (if using) until fully incorporated into the melted marshmallow mixture. The shortening will help make the fondant smoother and easier to handle.
- Incorporate Powdered Sugar: Sift about half of the powdered sugar (1 pound) into the bowl with the melted marshmallow mixture. Stir with a rubber spatula or wooden spoon until it forms a thick, sticky dough.
- Transfer and Knead: Lightly grease your hands and a clean work surface with shortening. Scrape the dough onto the prepared surface. Gradually add the remaining powdered sugar, about half a cup at a time, kneading it into the dough. Continue kneading until the fondant is smooth, elastic, and no longer sticky. You may not need all of the powdered sugar; the amount can vary depending on humidity. The fondant should feel similar to play-doh.
- Rest the Fondant: Shape the fondant into a smooth ball. Lightly grease the surface of the fondant or dust it with a tiny bit more powdered sugar to prevent sticking. Wrap it tightly in plastic wrap, ensuring there are no air pockets. Let it rest at room temperature for at least 2-4 hours, or preferably overnight, to allow the texture to fully develop and become more pliable.
Pro Tip: For a brighter white fondant, use a high-quality brand of powdered sugar and ensure your marshmallows are also white. Some brands of marshmallows can have a slightly yellowish hue.

Traditional Gelatin-based Fondant Recipe
This recipe is closer to the fondant used by professional cake decorators. It requires a bit more precision but results in a very smooth, pliable, and stable fondant ideal for intricate designs and covering cakes.
Yields: Approximately 2.5 lbs
Prep time: 30 minutes
Resting time: 12-24 hours
Ingredients:
- 1/4 cup (about 60ml) cold water
- 2.5 teaspoons (about 10g) unflavored gelatin powder
- 1/2 cup (about 120ml) corn syrup or glucose syrup
- 1 tablespoon glycerine (optional, but recommended for pliability)
- 2 tablespoons vegetable shortening
- 1 teaspoon vanilla extract or other flavoring (optional)
- 3.5 to 4 pounds (about 1.6 to 1.8kg) powdered sugar, sifted, plus more for dusting
Equipment:
- Small bowl
- Medium saucepan
- Heatproof bowl (for double boiler setup)
- Whisk
- Sifter
- Rubber spatula or wooden spoon
- Clean work surface
- Plastic wrap
Instructions:
- Bloom the Gelatin: In a small bowl, sprinkle the gelatin powder over the cold water. Let it sit for 5-10 minutes until it absorbs the water and becomes jelly-like (this is called “blooming”).
- Prepare the Syrup: In a medium saucepan, combine the corn syrup (or glucose syrup), glycerine (if using), and vegetable shortening. Heat gently over low heat, stirring constantly, until the shortening is melted and the mixture is warm. Do not boil.
- Dissolve Gelatin: Add the bloomed gelatin mixture to the warm syrup. Stir constantly over low heat (or in a heatproof bowl set over simmering water, a double boiler) until the gelatin is completely dissolved. Do not let the mixture boil, as this can degrade the gelatin’s setting power.
- Add Flavoring: Remove from heat and stir in the vanilla extract or other flavoring, if using.
- Combine with Sugar: Sift about 2 pounds (900g) of the powdered sugar into a large mixing bowl or the bowl of a stand mixer fitted with a dough hook. Make a well in the center. Pour the warm gelatin mixture into the well.
- Mix the Dough: Using a rubber spatula or the dough hook on low speed, gradually incorporate the powdered sugar into the liquid mixture. Continue mixing until a shaggy dough forms.
- Knead the Fondant: Turn the dough out onto a clean work surface lightly dusted with powdered sugar. Begin kneading, gradually adding more sifted powdered sugar as needed, until the fondant is smooth, elastic, and no longer sticky. It should have a consistency similar to firm play-doh. Be careful not to add too much extra powdered sugar, as this can make the fondant dry and prone to cracking.
- Rest and Mature: Shape the fondant into a smooth ball. Lightly grease the surface with shortening or a neutral oil. Wrap tightly in plastic wrap, pressing out all air bubbles. Let it rest at room temperature for at least 12-24 hours. This resting period is crucial for the fondant to mature, allowing the ingredients to fully meld and the texture to become perfectly pliable.
Working With Fondant: Techniques And Tips
Once your fondant has rested, it’s ready to be transformed into stunning cake decorations. Proper handling is key to achieving professional results.
Preparing Fondant For Use
Before rolling, fondant needs to be brought back to room temperature and kneaded briefly to soften it.
- Bring to Room Temperature: Remove the fondant from its plastic wrap. If it feels stiff, let it sit at room temperature for about 30 minutes to an hour.
- Knead Briefly: Lightly grease your hands with shortening or a neutral oil. Knead the fondant gently for a few minutes until it becomes smooth and pliable again. If it feels slightly sticky, dust your hands and work surface with a tiny bit of powdered sugar or cornstarch.
Rolling Fondant
Achieving a smooth, even layer of fondant is essential for a professional finish.
- Surface: Work on a clean, dry surface lightly dusted with powdered sugar or cornstarch. Some decorators prefer a silicone rolling mat for its non-stick properties.
- Tools: Use a large, smooth rolling pin (a marble or wooden one works well). Avoid pins with handles that might leave indentations.
- Technique: Start by flattening the fondant ball slightly with your hands. Roll from the center outwards, rotating the fondant frequently (about a quarter turn each time) to ensure even thickness and prevent sticking.
- Thickness: For covering a cake, aim for a thickness of about 1/8 to 3/16 inch. If you’re making cut-outs or decorations, you might roll it thinner or thicker depending on the design.
- Lifting and Draping: Once rolled to the desired size and thickness, carefully drape the fondant over your rolling pin to transfer it to the cake. Gently unroll it over the cake, starting from the center and working your way outwards. Smooth the top first, then carefully ease the sides down, smoothing out any pleats or air bubbles as you go. Use a fondant smoother to achieve sharp edges.
Coloring Fondant
Adding color to fondant allows for incredible customization.
- Gel Food Coloring: This is the preferred type of coloring for fondant as it is highly concentrated and doesn’t add excess moisture, which can make the fondant sticky.
- Adding Color: It’s best to color the fondant *before* you need to roll and cover a cake. Take a portion of fondant, make a well in the center, and add a small amount of gel coloring.
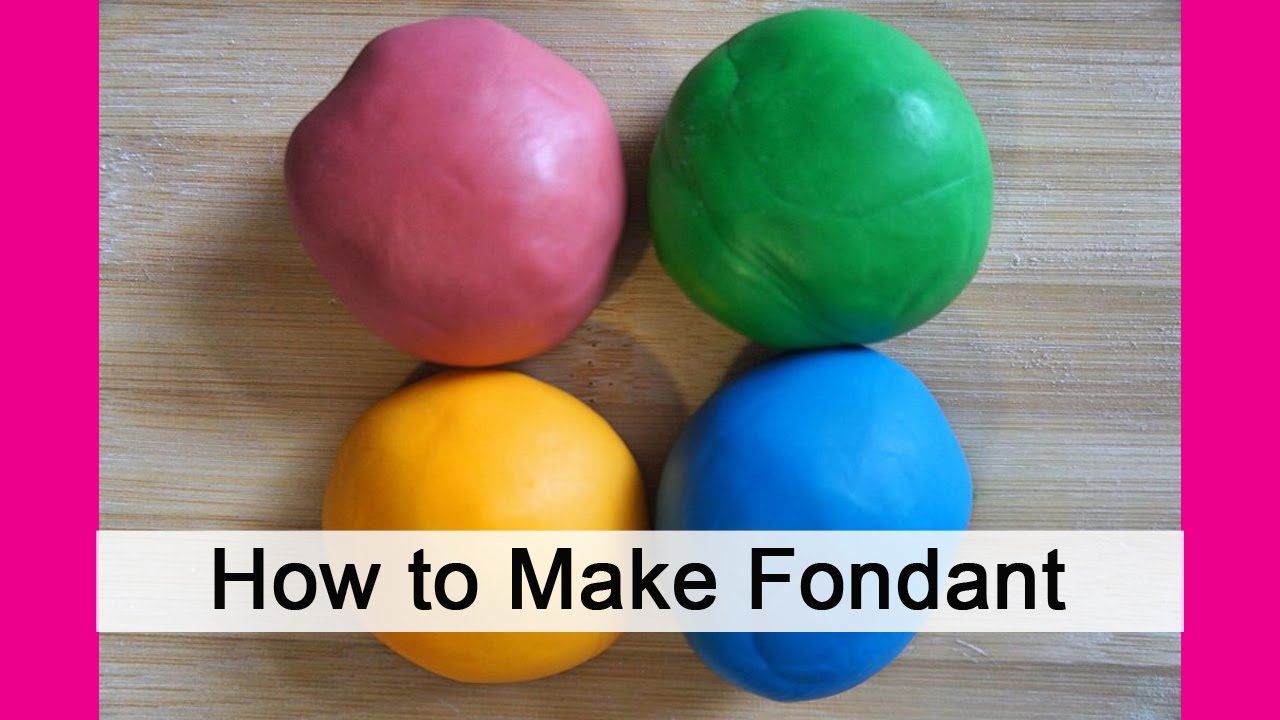
- Kneading: Fold the fondant over the color and begin kneading. Continue kneading, adding more color gradually until you achieve the desired shade. Wear gloves to avoid staining your hands. For deep or vibrant colors, you may need to add a significant amount of coloring.
- Marbling: To create a marbled effect, take two or more colors of fondant, flatten them slightly, and stack them. Fold them over each other a few times, then roll. Repeat the folding and rolling process a few more times until you achieve the marbled pattern. Don’t overwork it, or the colors will blend completely.
Flavoring Fondant
As mentioned, extracts are the easiest way to add flavor. Add them during the kneading stage. Be mindful that oil-based extracts can sometimes make the fondant slightly greasy.
Fondant Decorations: Beyond Covering Cakes
Fondant isn’t just for covering cakes; it’s a versatile medium for creating a wide array of decorative elements.
Creating Flowers And Other Shapes
Fondant can be molded, cut, and sculpted into virtually any shape imaginable.
- Cut-outs: Use cookie cutters to create simple shapes like stars, hearts, or letters.
- Molding: Small silicone molds are readily available for creating intricate details like pearls, leaves, or ornate patterns. Simply press fondant into the mold and carefully release.
- Sculpting: For more complex designs like figures, animals, or elaborate flowers, you’ll need to sculpt the fondant by hand. Start with a basic shape and gradually add or remove fondant to create the desired form. Tools like ball tools, veining tools, and modeling sticks can be very helpful.
- Petals and Leaves: For flowers, roll out fondant thinly and use petal cutters or a knife to shape individual petals. Use a ball tool to thin the edges and create a natural curve. Attach petals together using a small amount of edible glue or water. For leaves, roll out fondant, cut a leaf shape, and use a veining tool to create realistic texture.
Adding Texture And Detail
- Impression Mats: These flexible mats have various patterns (wood grain, lace, damask) that can be pressed into fondant to add texture.
- Edible Paint and Dusts: Once decorations are dry, you can paint them with edible food coloring paints or add shimmer with edible luster dusts.
- Royal Icing Accents: Sometimes, a touch of piped royal icing can add the perfect finishing detail to fondant decorations.
Storing Fondant
Proper storage is crucial to maintaining the quality and usability of your homemade fondant.
Short-term Storage (up To 2 Weeks)
- Wrap Tightly: After kneading, shape the fondant into a smooth ball. Lightly grease the surface with shortening or a neutral oil, or dust with a tiny bit of powdered sugar.
- Double Wrap: Wrap the fondant tightly in plastic wrap, ensuring there are no air pockets. Then, place the wrapped fondant inside an airtight container or a heavy-duty zip-top bag.
- Refrigeration: Store the wrapped fondant in the refrigerator. This will help it stay firm and prevent it from drying out.
Long-term Storage (up To 2-3 Months)
- Freezing: For longer storage, fondant freezes well. Wrap it as described above (tightly in plastic wrap, then in a freezer bag or airtight container).
- Thawing: When ready to use, remove the fondant from the freezer and let it thaw completely in its packaging at room temperature. This can take several hours. Do not unwrap it while it’s thawing, as condensation can make the fondant sticky. Once thawed, knead it briefly to restore its pliability.
Important Note: Always check the fondant for any signs of mold or spoilage before using it, especially if it has been stored for an extended period. If it smells off or looks discolored, discard it.
Troubleshooting Common Fondant Problems
Even with the best recipes and techniques, you might encounter a few hiccups. Here’s how to address them:
Fondant Is Too Sticky
This is often due to high humidity, adding too much liquid, or not enough powdered sugar.
- Solution: Gradually knead in more sifted powdered sugar, a tablespoon at a time, until the desired consistency is reached. Work in a cool, dry environment if possible. You can also try chilling the fondant slightly to make it easier to handle.
Fondant Is Too Dry Or Crumbly
This can happen if too much powdered sugar was added, or if it was left uncovered for too long.
- Solution: Knead in a small amount of vegetable shortening or a few drops of glycerine. Alternatively, microwave a tablespoon of water or shortening for a few seconds until warm (not hot), then knead it into the fondant. Start with very small amounts and add more as needed.
Fondant Is Tearing When Rolled Or Draped
This usually indicates the fondant lacks elasticity, possibly due to insufficient kneading or a problem with the gelatin.
- Solution: Knead the fondant a bit more to develop its elasticity. If it continues to tear, try incorporating a small amount of tylose powder (also known as CMC powder), which is a food-grade thickening agent that improves elasticity and drying time. Mix about 1 teaspoon of tylose powder per pound of fondant and knead it in thoroughly. Let it rest for about 30 minutes before using.
Fondant Has An Unpleasant Texture (grainy Or Chewy)
- Grainy Texture: This is usually due to un-dissolved powdered sugar or sugar crystallization. Ensure you sift your powdered sugar and knead thoroughly. Using corn syrup or glucose syrup is essential to prevent this.
- Too Chewy: This can be caused by too much gelatin or not enough powdered sugar. If it’s slightly too chewy, try kneading in a bit more powdered sugar. If it’s excessively chewy, it might be difficult to salvage without adding significantly more sugar, which could alter the texture.
Comparison: Homemade Vs. Store-bought Fondant
While homemade fondant offers superior taste and customization, store-bought options provide convenience. Here’s a quick comparison:
| Feature | Homemade Fondant | Store-Bought Fondant |
|---|---|---|
| **Taste** | Generally superior, fresher, and customizable | Can be bland or have a chemical aftertaste |
| **Texture** | Often smoother, more pliable, and less prone to cracking | Can vary by brand; some are stiff, others too soft |
| **Ingredients** | Full control over ingredients, can be made vegan | May contain artificial colors, flavors, and preservatives |
| **Cost** | More economical for large quantities | Can be expensive, especially for large cakes |
| **Time** | Requires preparation and resting time | Ready to use immediately |
| **Coloring** | Easy to color with gel colors | Often comes pre-colored or requires gel colors |
| **Availability** | Requires making it yourself | Readily available at craft and baking supply stores |
Frequently Asked Questions
Can I Make Fondant Without Gelatin?
Yes, you can make fondant without gelatin. For a vegan or vegetarian option, you can substitute agar-agar powder for gelatin. Typically, you’ll need about 1 teaspoon of agar-agar powder dissolved in the liquid (water or milk) and heated according to package directions before incorporating it with the sugar and other ingredients.
The texture might be slightly different, potentially a bit firmer.
How Do I Get My Fondant Perfectly White?
To achieve a bright white fondant, use a high-quality brand of powdered sugar that is known for its whiteness. Ensure your marshmallows (if using the marshmallow recipe) are also white, as some brands have a yellowish tint. Avoid using butter flavorings or yellow-colored extracts. You can also add a tiny amount of white food coloring gel (specifically designed for confectionery) during the kneading process.
Leave a Reply